wild dog mountains
The Wild Dog Mountains are a rugged range of peaks and valleys within the Blue Mountains National Park, and are known for their remote wilderness and stunning natural beauty and makes it a great option for an epic multi-day hike. Here I have added a detailed breakdown of what to expect on this unforgettable journey that took us through rugged bushland, past stunning views, and over rushing rivers.
Day 1 (04/01/2023)
Distance: 6.63 km
Elevation: 200 m
Dunphys Campground to the Junction on Breakfast Creek
The journey began with a scenic drive along Megalong Valley Road before parking up at Dunphys Campground. We began our hike early in the morning from Dunphy’s Campground along Ironpot Ridge, and then descended Ironmonger ridge to the junction on Breakfast creek.
The descend down to the creek was steep and overgrown, and took more time than we expected. The heavy regrowth of the vegetation post bushfires made parts of the track non-existent. The views from the ridge were simply breathtaking, with sweeping views over the surrounding valleys.
Once at Breakfast junction, we found a nice flat spot by the water and set up camp for the night, enjoying a well-deserved meal and wine by the campfire after a challenging first day.
Day 2 (05/01/2023)
Distance: 8 km
Elevation: 40 m
Cox’s River to the base of Blue Dog Spur
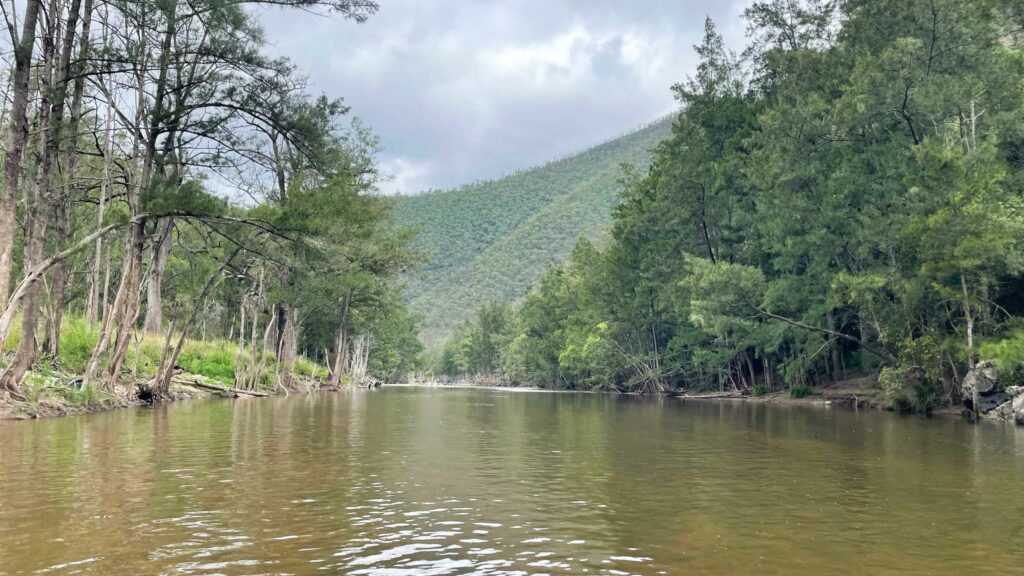
Day two was all about the river as we hiked an easy 8km down Cox’s River, taking in the natural beauty of the Blue Mountains along the way. The river provided a refreshing respite from the heat of the day, and we took the opportunity to cool off with a swim.
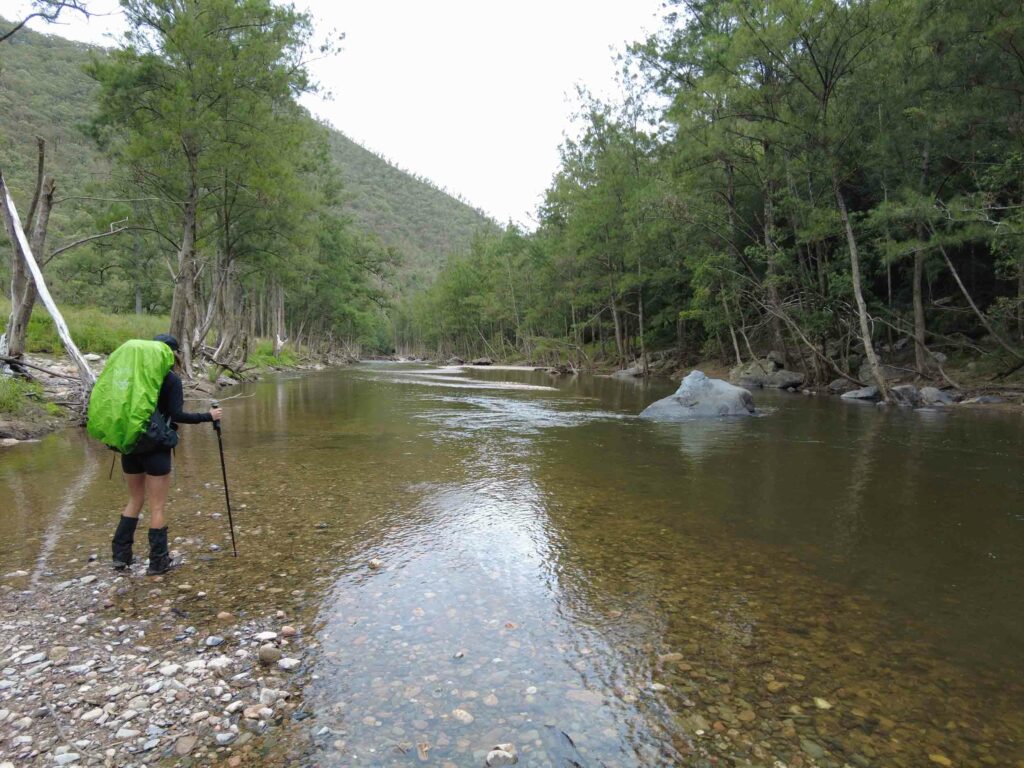
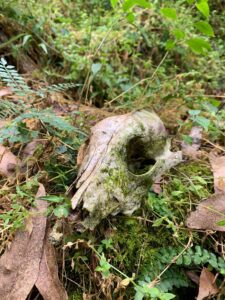
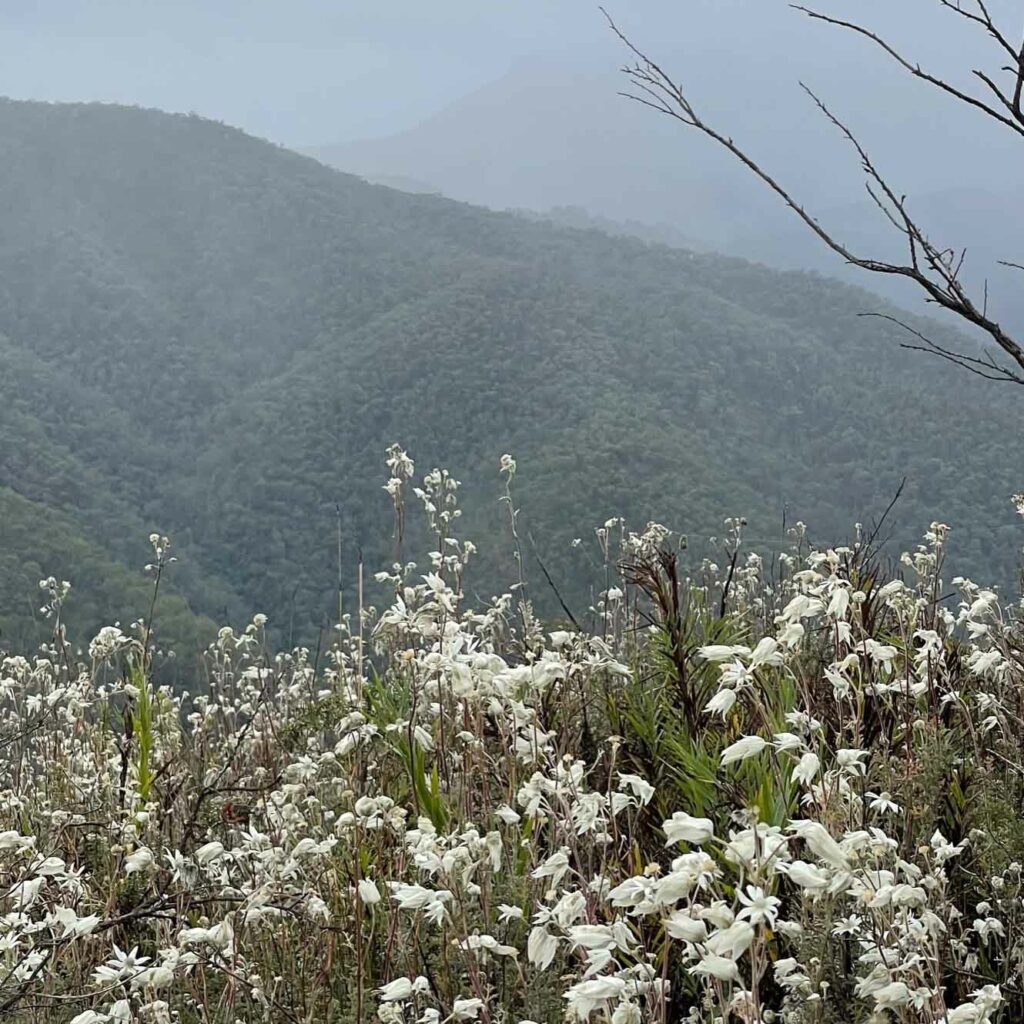
The field along the river was a spectacular scene of butterflies flying over the yellow wildflowers, and we spotted many animal bones eaten probably by wild dogs or pigs.
There were some river crossings where the path was too rugged to continue, or where there was a cliff face.
Photos by:
David Bartley
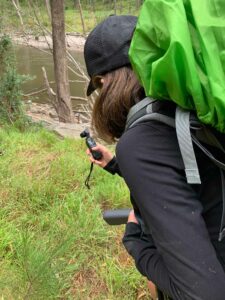
We continued the hike to the base of Blue Dog Spur, where we set up camp for the night. This spot was perfect for exploring, and we saw a family of wild pigs who ran away from us as soon as they sensed our presence. There was also an old cage trap which seemed to be placed by national parks and wildlife service, and the trap was disarmed by potentially hikers. We took the time to relax and enjoy the stunning scenery, feeling completely immersed in the beauty of the Australian bush.
Day 3 (06/01/2023)
Distance: 8.5 km
Elevation: 685 m
Blue Dog Spur to Knights Deck and Mobbs Soak
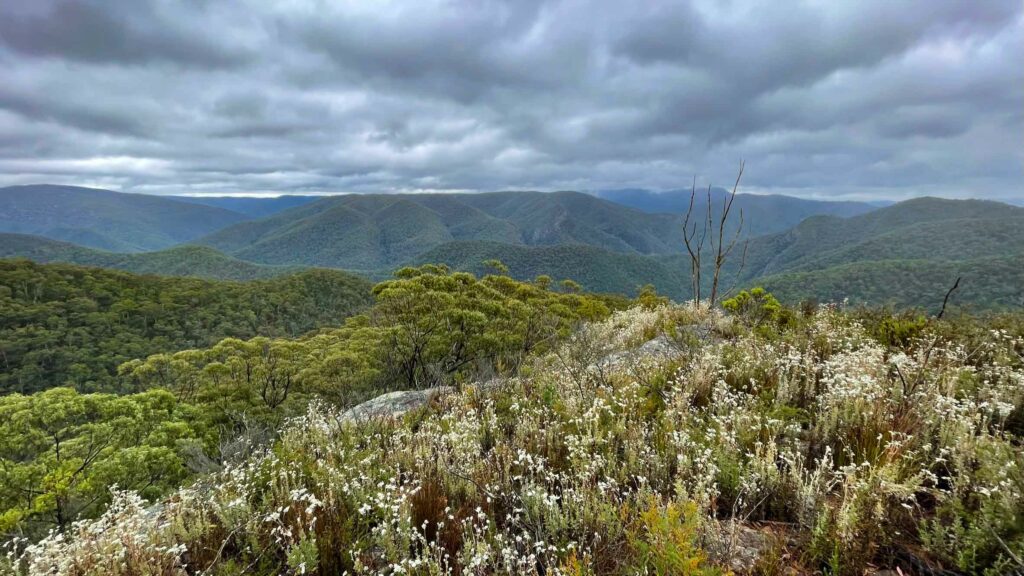
On day three, we faced the most challenging part of our hike: the ascent up Blue Dog Spur. We fought our way through passion fruit vines, crawled under trunks, and hiked up to the ridge. Suddenly, rain and mist surrounded us, obscuring the view once we reached the top. Despite our disappointment at missing the Knight’s Deck view, we decided to hike the 1km towards the lookout and hope for the best. The junction where the Knight’s Deck lookout track starts is marked by a large cairn, making it hard to miss.
We waited there for a bit, exploring the area and finding a nice lookout to have our freeze-dried lunch while waiting for the mist to clear up. Then, we left our backpacks there and hiked another 200m to the Knight’s Deck view. The panoramic views of Breakfast Creek valley to the north and the Cox’s River valley to the west were breathtaking. We were lucky with the weather, as the fog cleared up just in time for us to fully appreciate the view.
Afterwards, we proceeded to Mobbs Soak from Yellow Dog Ridge, which required two hours of extreme bush-bashing due to its overgrown state. This part of the hike was also challenging and required frequent stops to check the GPS and ensure we were on the right track. The vegetation was mostly up to our height and very difficult to push through. Despite the challenging terrain, the hike was well worth it. We set up camp at Mobbs Soak, replenished our hydration bladders and bottles by filtering the water from the swamp, had dinner and enjoyed a sense of peace and tranquility that’s hard to find elsewhere
Day 4 (07/01/2023)
Distance: 12.37 km
Elevation: 324 m
Wombat Parade
On our last day of hiking, we tackled a steep and slippery climb to the Warrigal Gap. If we had the luxury of one more day, we would have hiked to Splendour Rocks and camped there for another night, but alas, we had to follow the Wombat Parade and make this our final day. It turned out to be my favorite track of the whole trip, with lots of boulders to scramble over and plenty of detours trying to find the right path. Eventually, we made it to the Medlow Gap fire trail, which took us back to Dunphys Campground, marking the end of our adventure.
Throughout the journey, we were continually amazed by the beauty of the Blue Mountains. It’s a challenging hike that requires a good level of fitness, but the rewards are well worth it. If you’re looking for an adventure that will take you off the beaten path and leave you with memories that will last a lifetime, this is the perfect trip for you.
Tips on what essentials to pack:
At the beginning of my hike, my pack weighed in at 16kg,
which was more than I intended. But that included 3L of water for the day and
1.5L of wine for the night – some things are just essential! Admittedly, I
probably packed a few unnecessary items, like a comb and facewash. But by the
third day, my pack had lightened up to around 13kg, which was much more
manageable for the challenging climb.
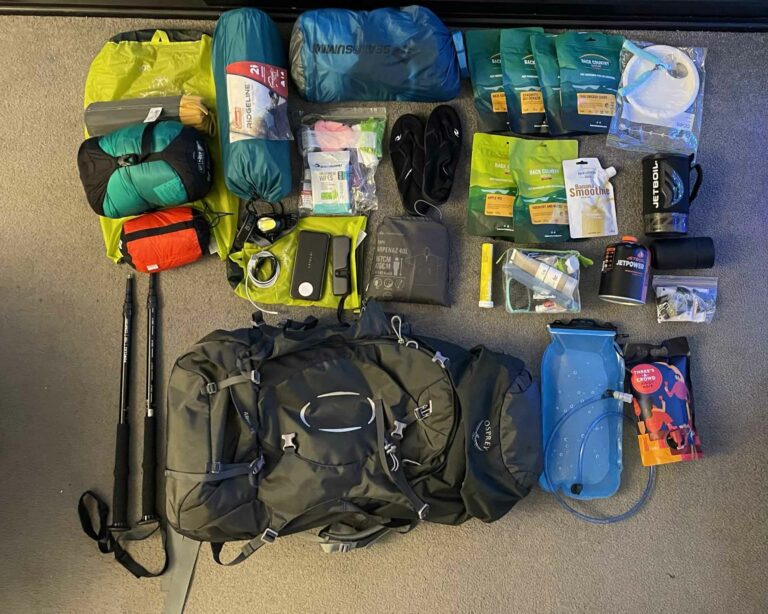
Backpack:
When it comes to overnight hikes, I rely on my Osprey Ariel 55L backpack, which is size M. It’s important to choose a pack size based on your torso length, and in the link provided, you can find a guide to help you select the perfect size for you. The adjustable design of Osprey packs allows for a customized fit, ensuring optimal carry performance on the trail.
Tent:
I always bring my trusty Coleman Ridgeline Adventure Tent on my trips – it’s a 3-season, 2-person tent that weighs just 1.7 kg, making it perfect for backpacking. Its lightweight design makes it easy to carry, while its easy-to-set-up structure ensures that I can set up camp quickly and efficiently. I opted for a 2-person tent to ensure that I have enough space for myself and my gear inside the tent. This tent has never let me down, even during heavy rain. It’s a reliable and durable option that has kept me safe and dry no matter the weather.
Sleeping Bag and mattress:
I absolutely love my Sea to Summit Journey Dawn sleeping bag – it keeps me warm and cozy all night long, even in chilly temperatures. The best part is that it’s incredibly lightweight and packs down to a very small size, making it easy to carry on multi-day hikes. With this sleeping bag, I can rest easy knowing that I’ll be comfortable and warm no matter where my adventures take me. I use the Forclaz Trek 700 Long Trekking Air mattress for my overnight hikes. It’s compact and has silicone patches on the top to prevent my sleeping bag from sliding around during the night.
Liner:
I also bring along a Sea to Summit liner on my trips – not only does it keep my sleeping bag clean, but it also adds an extra layer of warmth when I need it. Plus, on hot nights, I can use it on its own as a lightweight and breathable sleeping option. It’s a versatile addition to my gear that I never leave home without.
Jetboil:
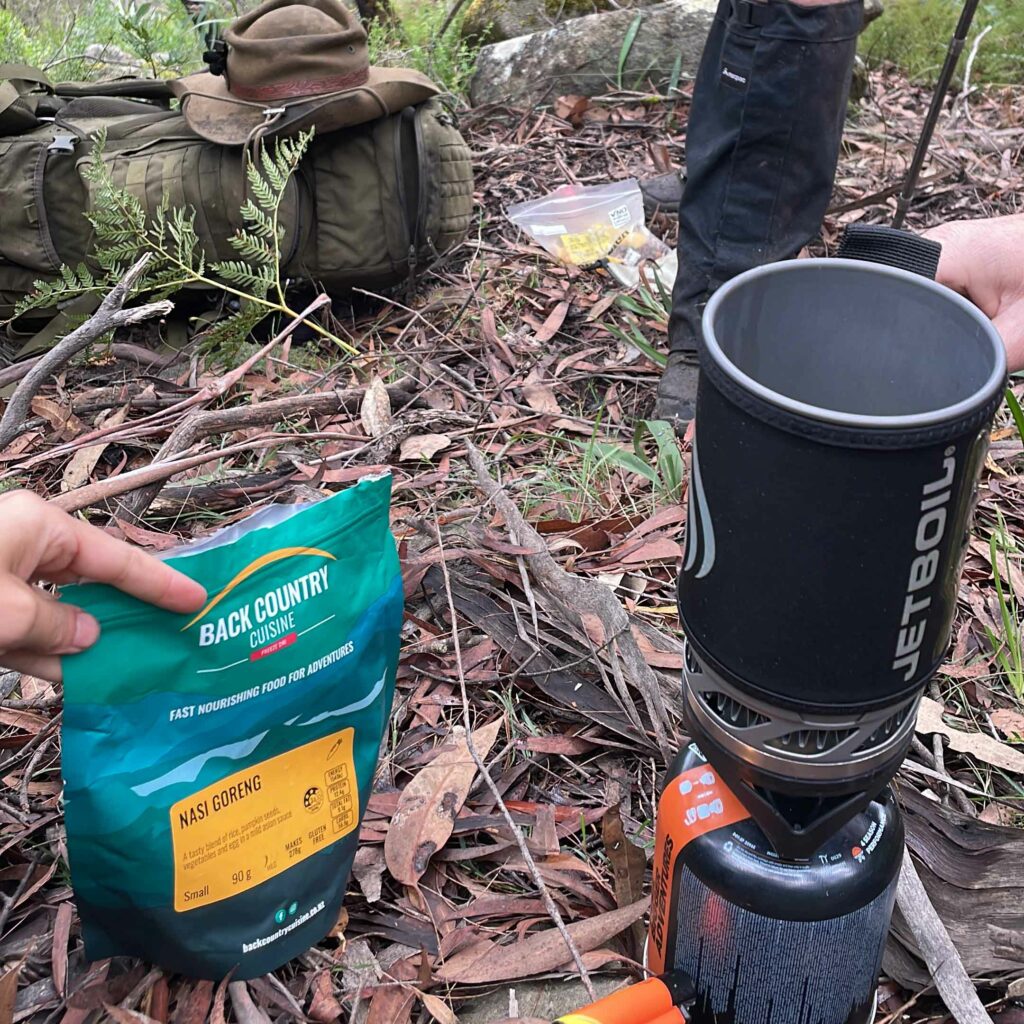
My Jetboil has become a staple item in my gear collection – I even bring it along on day hikes! It can boil water in under 2 minutes, making it perfect for enjoying a cup of tea or coffee next to a waterfall, or quickly preparing a hot meal from freeze-dried ingredients. It’s lightweight and easy to use, and has quickly become one of my go-to items for any outdoor adventure.
Food:
On our multi-day hike, we decided to indulge a little and carry some fancier food options for the first two nights. Our dinners included delicious BBQ lamb with vegetables and freeze-dried mashed potatoes, as well as beef kebabs with veggies and rice. We finished all our food before the challenging third day and then switched to Backcountry Cuisine. Our group agreed that the Spicy Thai Chicken Curry, Roast Lamb and Vegetables, and Apple Pie were the standout meals of the trip – they were absolutely delicious! Backcountry Cuisine offers a great selection of breakfast, mains, desserts, snacks, and smoothies, making it a fantastic option with something for everyone. I also brought trail mix, hydrolyte tablets, smoothie, wine, and protein bars for snacks.
My other gears included Merino base layer leggings and tops, rashies, extra socks and undies, quick-dry shorts, a microfiber towel, a poncho, Reefwalkers, dry bags for my electronic gear and sleeping bag, a power bank and camera gear, water purification tablets, a first aid kit, a headlamp, a hydration bladder, an extra water bottle, a cup, cutlery, paper plates, PLB, GPS, Jetboil gas, trekking poles, a sanitary pack, a toilet pack, tea bags, painkillers, and personal medications.
Please note that some links included in this post may be affiliate links. This means that we may receive a commission or financial benefit if you make a purchase through those links. However, rest assured that we only recommend products or services that we have personally used and believe in. Any commission or financial benefit we receive from these affiliate links helps to support the maintenance of our website and the creation of new content for our readers. Thank you for your support!